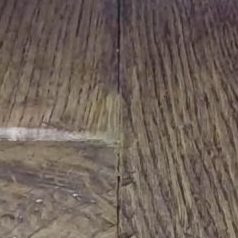
A chipped edge on a wood flooring board can be unsightly and dangerous. Anyone walking across the floor could snag their socks, or end up with a splinter in their toe!
Using hot wax, and a few simple tools, a chipped or broken edge can be made to look like it never happened – and keep homeowners safe when walking across their floor.
Watch our tutorial above or keep reading for how to fix a chipped edge on wood flooring.
How to Fix a Chipped Edge on Wood Flooring

Tools needed:
- Hard wax that matches your floor
- Hot iron
- Metal or plastic scraper or 5-way tool
- Rag
Get these supplies on Amazon here.
Step 1: Warm up the iron and pick your wax
First, warm up the iron as you decide which colors you’re going to use. You may need to mix a few colors to get an accurate match. In our video, we’ve pre-made a small “button” of wax to use in our chipped edge. To do this, scrape off pieces of the wax you’d like to combine. Then, melt the colors together into a flat circle and let cool. You’ll use this button in step 2.
Step 2: Melt wax into the chipped area
After your iron is hot and your wax is ready, put your wax on top of the chip. Next, press your hot iron into the wax to fill the area. Build this up so that you have excess to scrape off to make the area flush and smooth. Once the area is filled in, allow the wax to cool. You’ll know it’s fully cooled when the color becomes duller than it was before.
Step 3: Scrape off excess wax and recreate bevel
Once the wax is cooled, use a plastic or metal scraper to scrape off the excess. If your floor has a bevel, use a knife or edge to recreate the bevel. After you’re satisfied with the bevel, use a rag to brush off any excess.
Step 4: Blend in repair
If your floor has wire-brushing or scraping, you may need to recreate that to blend in your chipped edge repair. You can use the edge of your scraper or a 5-way tool to make small “wire-brush” scratches in the grain.
Extra step: To blend in your repair, you can also use lighter wax that matches the highlights in the board. Melt this color over your first layer of wax, then scrape off the excess as it’s cooling. You’ll need to scrape it again if it’s along a bevel. Once you’re done, you can buff out the area to get off any more excess.
This type of repair can take some practice to get comfortable with these tools. Once you have a hang of it, you can save a lot of board replacements down the line.
Want to learn more about using a wood floor touch up kit?
Read our guide to wood floor touch ups, and download a checklist of all the things you need to build your own wood floor touch up kit. Whether it’s a chipped edge or a deep scratch, a touch-up kit is a great tool to quickly and professionally repair wood floors.
Wood Floor Touch Up Kit

Other Videos in this Series:
Make A Wood Floor Touch-up Kit
Fill An Open Knot In Wood Flooring
Fix A Long White Scratch On Wood Flooring