
You’ve heard it said: “follow the manufacturer’s instructions” when installing a hardwood floor.
It is tempting to rely only on past experience when doing an installation. After all, you do this for a living, right? How different could this floor be from the last X number of floors you’ve installed?
Installation is acceptance
As an installer, you are the last one to touch the floor before it’s nailed or glued down. Virtually every manufacturer says that if their floors aren’t installed according to their directions, for whatever goes wrong.
Consider the story of an installer who had to pay the full replacement cost of a floor that was clearly defective. The manufacturer sold the floor without a warranty, but the installers did not notice the defects prior to installation and so assumed the full liability of the floor.
Law firms are even specializing in helping homeowners “go after” installers and other parties that were involved in a flooring failure.
That’s a lot of liability to carry around!
Protect your liability by knowing what to do
We cannot recommend strongly enough that you read and follow every manufacturer’s installation instructions. Period, full stop.
Often it is very hard to be able to recall and know the difference between each manufacturer’s guidelines and the next. Details and differences can get muddled in your brain in the middle of a job.
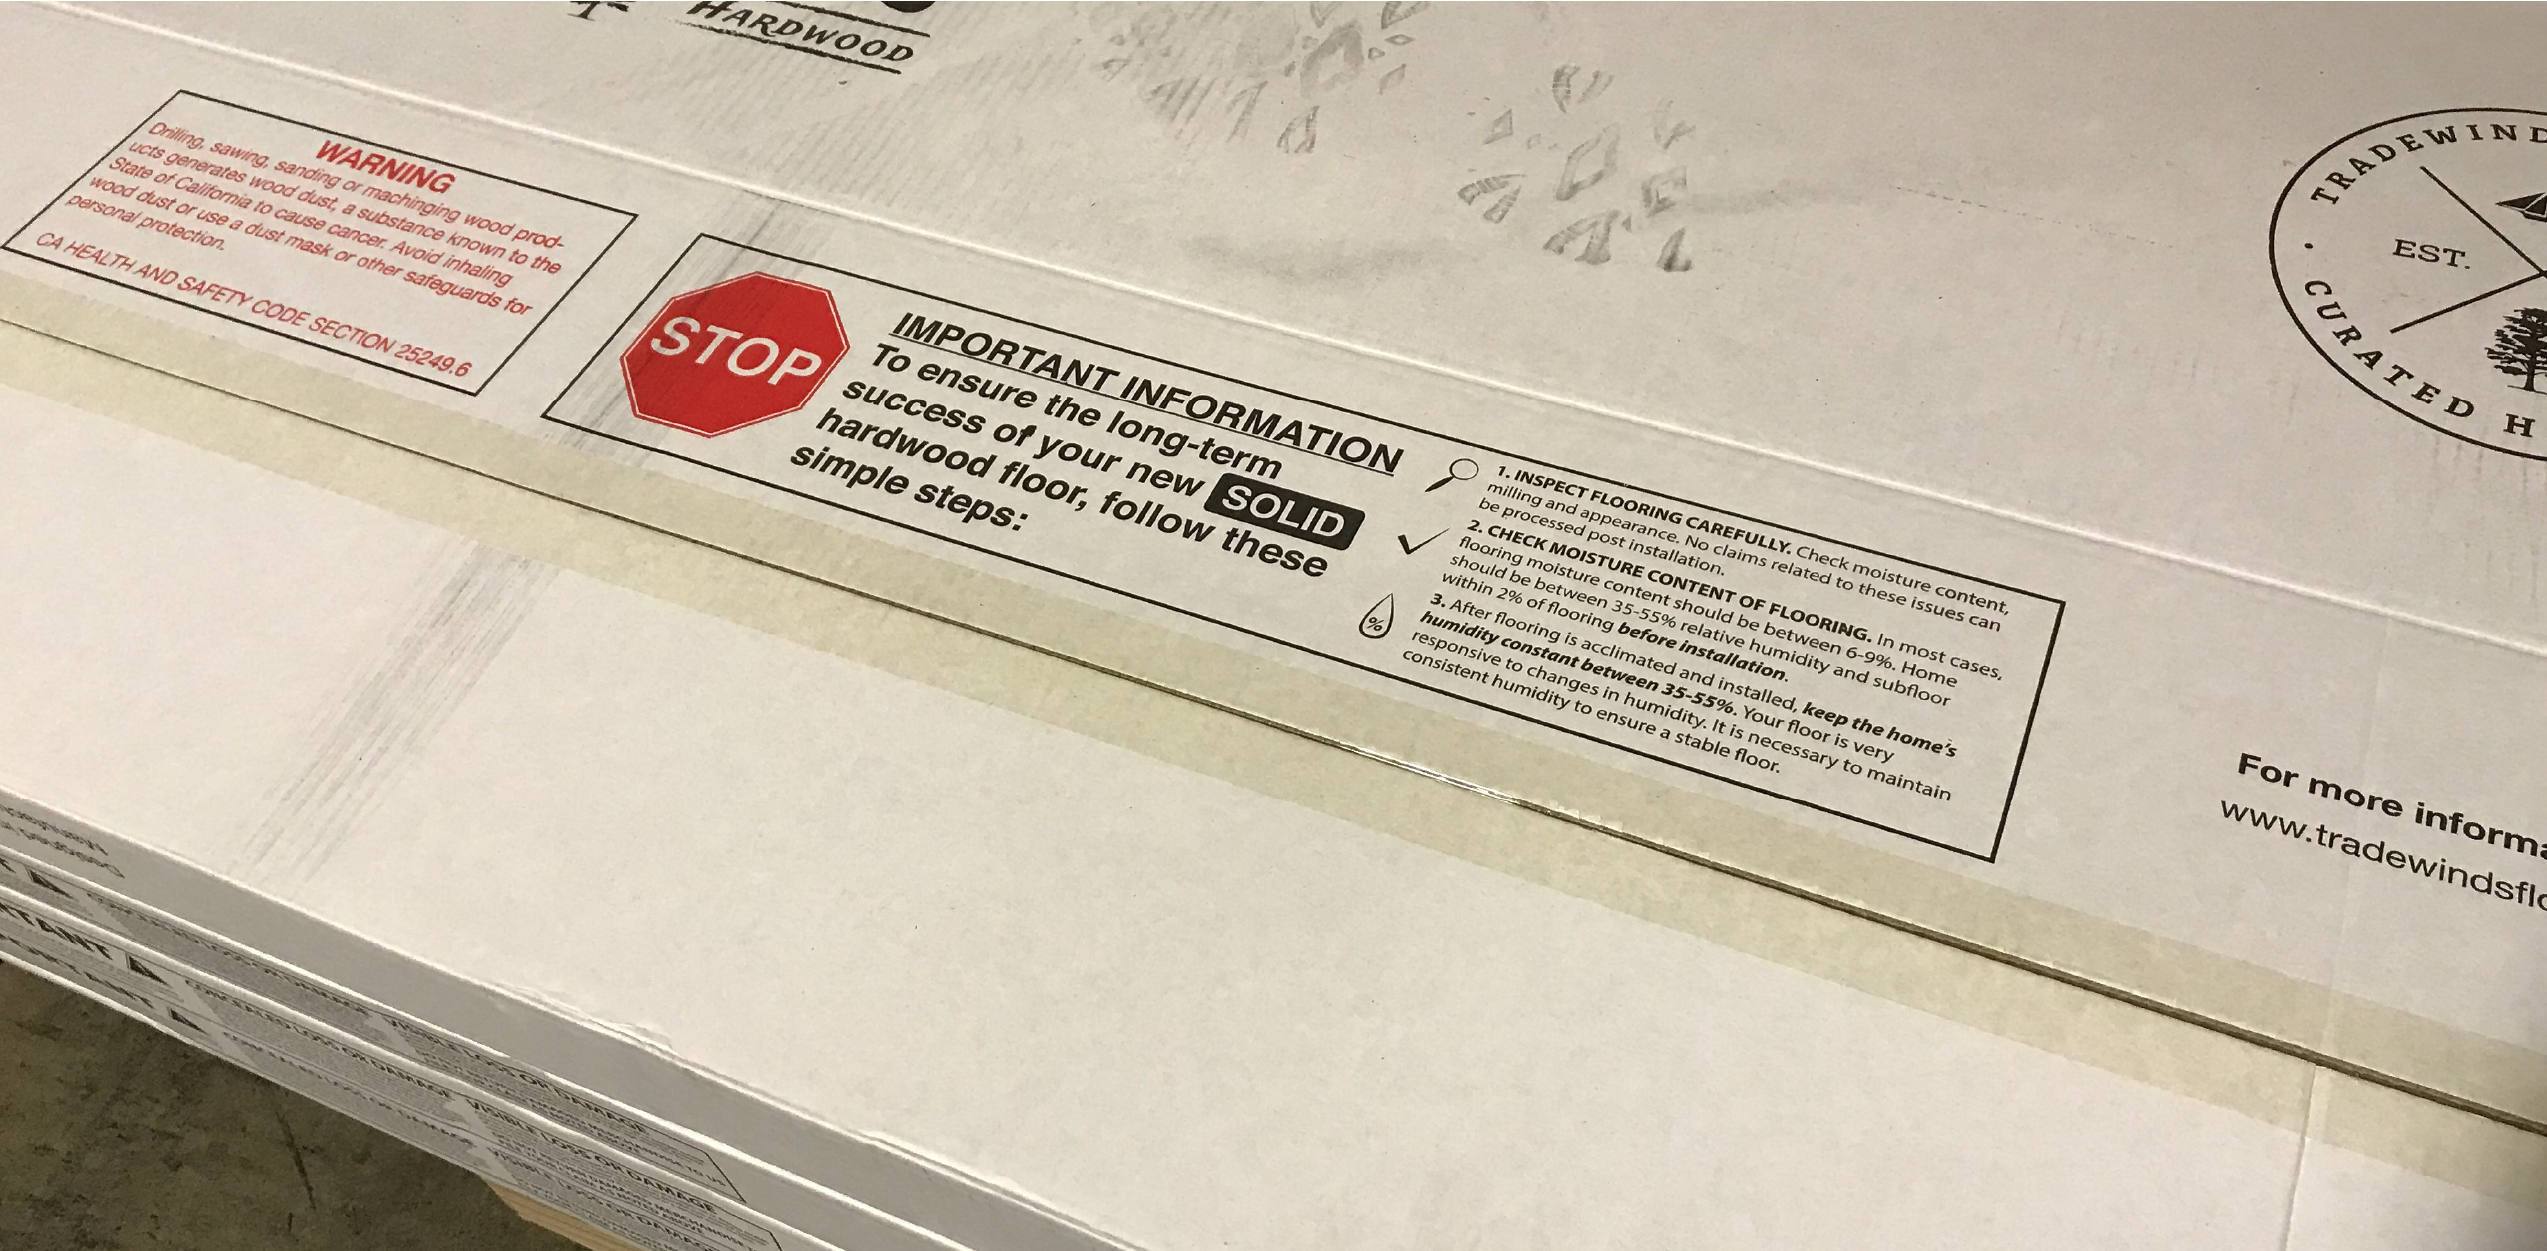
Was this supposed to be a ¼” or a ½” expansion gap?
Was it 35-55% relative humidity or 45-60%?
Should I be using a 1-½” staple or a 1-¼” cleat?
Would a glue assist method be best for this floor?
That is why we have all the installation and warranty guidelines for the products we sell on our website. Bookmark this link and make sure all your installers read these guidelines.
Five things you should do for every wood floor installation
We have developed a few guiding principles that will help you stay alert to things that could cause problems later on or increase your liability if anything were to go wrong.
This list is not intended as a substitute for reading and following the manufacturer’s installation instructions and the National Wood Flooring Association’s guidelines.
-
Approve the product for the wood floor installation
Before you do anything, be sure the floor you are there to install is the one your customer wants.
Next, do your own inspection of the floor before and during the installation process. Check boards as you go to approve the milling, the boards are straight, and there are no obvious defects.
Opening a box or two of flooring to rack out so the homeowner can see and approve the floor might be the most important thing you can do.
We have witnessed several unfortunate incidents where a perfectly good (and gorgeous!) floor had to be torn up and replaced all because it was the wrong color.
Would you paint a house without putting some paint on the walls first and getting the homeowner to sign off?
Paint is cheap, flooring is typically not. Don’t nail anything down until the homeowner approves color, size, texture, and species.
Remember: you are responsible for what you nail down. If the defect could have been caught before installation, it is typically not covered by a warranty after installation.
-
Acclimate the floor
When is my floor acclimated? Find out how to properly acclimate your floor in our Acclimation 101 video.
Consultation the manufacturer’s guidelines to acclimate the floor properly.
Most solid floors need the boxes opened, cross-stacked, and plastic unwrapped to be properly acclimated. Some engineered floors (not all) are only recommended to be acclimated to room temperature – not humidity.
So, how long does acclimation take?
That depends on how far apart the wood is from its “living environment.” There are no set time periods, which is why having a professional, calibrated moisture meter is critical.
Check out our Moisture & Acclimation Guide here for more information, and be sure to consider whether or not the home you are installing in will need a whole home humidifier to stay consistently within the humidity range that the manufacturer specifies.
-
Check your subfloor
A great wood floor installation starts with a good subfloor. In general, you should ensure that your subfloor is clean, dry, sound, and flat before installation.
- Clean: any dirt or debris can cause boards to not fit together properly.
- Dry: wet or moist subfloors transfer moisture to your flooring, causing it to expand after it is installed.
- Sound: be sure to walk across the subfloor to see if there are areas that squeak. You may need to fix joists or replace parts of your subfloor.
- Flat: a flat subfloor will allow the new flooring to fit tightly against it. Any dips or high spots in the subfloor will likely lead to movement and squeaks in your new wood floors.
-
Use the right fasteners or glue and trowel
It can be tempting to use whichever fastener you have on hand to nail down a floor. The same goes with glueing a floor down – sometimes you just grab the trowel you have in your truck.
This mistake can then lead to squeaks, cracks, and general flooring failure.
Consequently, the cost of tear out, replacement, labor and materials could land squarely in your lap if you don’t use the right fastener (or trowel/adhesive).
This is one thing that the installer has full control of, and so it directly relates to your liability for the floor. Do the right thing and consult the manufacturer’s installation guidelines for the proper fastener or adhesive/trowel combo.
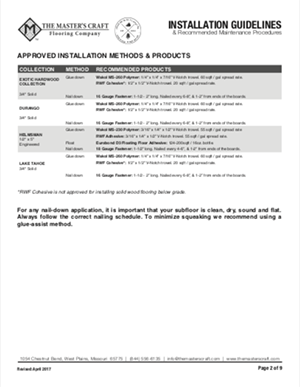
We have a handy cheat sheet in the front of ours for easy reference.
Some tips:
- Don’t forget to set the pressure on your compressor appropriately.
- If you are glueing down, be sure to replace your trowel as required. The metal teeth will wear down every couple hundred square feet or so, which means you’ll be using the wrong trowel half-way through the job if you don’t replace it. Don’t be this guy!
- Consider using a glue-assist method for nail-down installations to reduce the chance of your floor squeaking later on after seasonal changes. Some wider floors even require this method, so once again, check those manufacturer guidelines!
-
Have everyone sign off once the job is done
You’ve finished the installation, cleaned up your tools, and given the floor a final vacuum or mop – and it looks really great. Job well done, right?
Before you leave the job site, take time to get all parties to sign off on your job well done. Then, talk about cleaning and maintenance with the homeowner, and get their documented signature that they approved of your work before you left. Leaving great last impression can help you avoid legal issues in the future.
Often times in legal disputes between homeowners and installers and other parties, the phrase “nobody told me about that” is presented as a defense for not keeping the home in appropriate conditions, or cleaning and maintaining it as required.
The truth is, this is actually a legitimate defense and has often been upheld in court!
As an installer, you are considered a professional. The homeowner is not.
Your responsibility (and also that of the retailer, supplier and builder, etc.) is to educate the end-user on how to maintain the product.
Simply taking the time to go over a few things about owning and maintaining a wood floor – and documenting that you did it – could prove to be the very piece of evidence that clears you of liability if things go wrong.
To help you get started, check out our cleaning page for free download guides to maintaining a new wood floor.
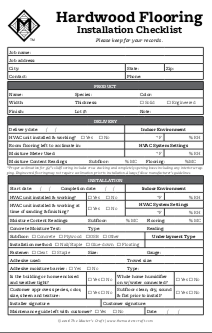
Our installation checklist can also help you document important data about the floor, including a space for both you and the homeowner to sign off. On the back are important things to consider for owning a wood floor.
If you take the time to fill out this form, then get sign-offs, and go over the items on the back you’ll be protecting your business and leaving a great impression that will likely lead to a referral.
List of wood floor installation resources linked in this article
- Installation And Warranty Guidelines for prefinished floors we sell
- Using The Right Moisture Meter
- Moisture And Acclimation Guide
- Humidifier Guide
- Stop Squeaky Floors By Using The Right Fastener
- Installation Checklists

Download this guide as a PDF
Keep a one-page PDF of this article in the hands of all your installers. Don’t forget to have copies of the manufacturer’s installation instructions too!
Not very useful to me. I need to know as a homeowner how I specify sanding and finishing quality. What are my options? How do I tell the installer what I want in the way of quality, smoothness, and durability? In short, how do I end up knowing that the installer knows and can do what is needed to reach or exceed my expectations?
Hi there! There’s a couple ways that you can find a great installer. First, we’d recommend looking for NWFA (National Wood Flooring Association) credentials. To receive certification, the installer must go through specific training. You can look for installers with this certification on the NWFA website here: https://www.woodfloors.org/certified-professional-search.aspx
From there, research those NWFA certified installers and read reviews. That’s a great way to see what they’re reputation is, what kind of work they do and how they handle customers.
As far as communicating with your installer, let them know what color you like, your lifestyle, and your budget. They can guide you to the right floor based on your needs, budget and timeline. We have a guide that walks through the process, and may help you communicate your needs with your installer: https://themasterscraft.com/unfinishedflooring/